-
Look for the IP address of the printer you wish to use - it might be in the printer's settings/screen or posted on the printer. Write it down.
-
Click on the Apple logo on the upper left-hand side of the desktop and select System Preferences from the menu.

-
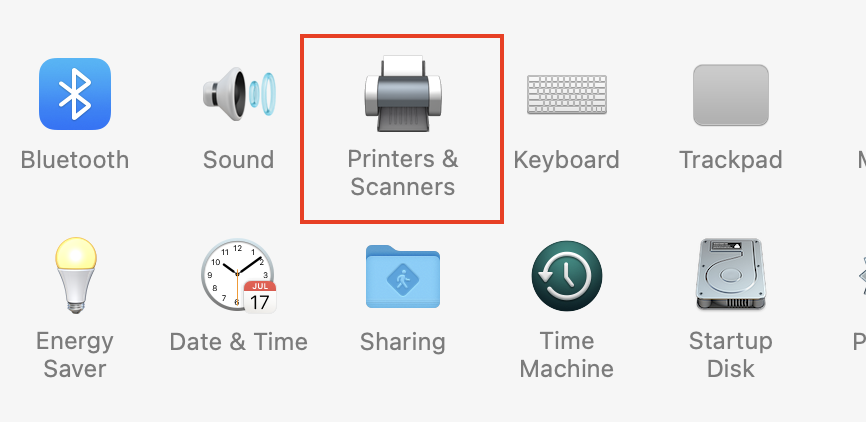
Select Printers & Scanners. Printers & Scanners will bring up a list of printers you have connected to on that particular computer.

-
Click the (+) button below this left-hand list to add a new network printer.

-
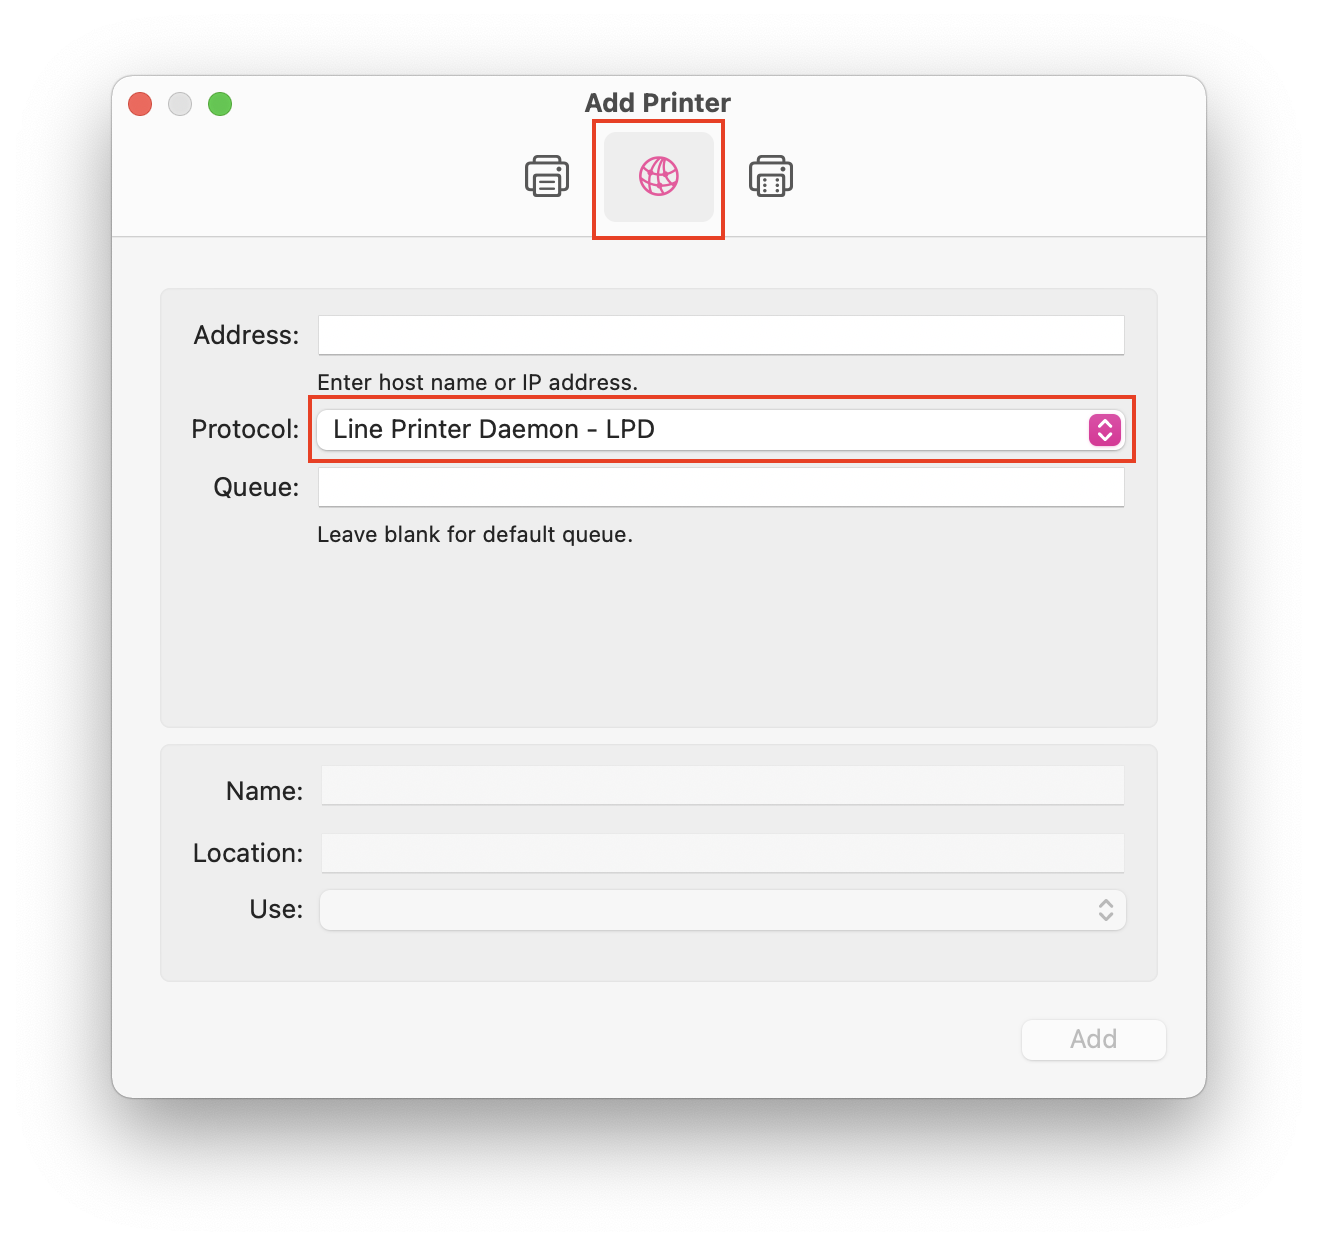
In the Add printer window, select the IP tab to search for the printer by its IP address.
6. For Protocol, choose Line Printer Daemon - LPD.
7. For the Address line, type the IP address of the desired printer.

8. When done entering the address, the computer will automatically detect the appropriate driver for the printer. Once the driver is found, the printer will appear in your list of printers. Verify that the model matches the printer you are targeting.
9. Click the Add button.
The printer will now appear on the list of printers on your computer.