BitDefender is Trinity's recommended and supported antivirus software. BitDefender includes antivirus and anti-spyware capabilities that will help protect your computer against security threats like viruses, trojans, rootkits, and adware. The ITS BitDefender licensing covers all Trinity-issued workstations and one personal device per employee and student.
Users
Availability
Faculty and Staff
Student
Personal Device Access and Installation
Faculty and Staff
Student
Windows
Mac
How to get help
Students, Faculty, and Staff.
If you use a Trinity-issued Windows or Apple computer, BitDefender is installed on your computer, but you can double-check by contacting ITS. Please visit the Access and Installation section for information on accessing a license for a personal device.
All student-facing computers have BitDefender. Please visit the Access and Installation section for information on accessing a license for a personal device.
You may install BitDefender on one personal computer by sending a request to ITS. You will receive a download link via email and can then follow these instructions for macOS or Windows computers to remove any other antivirus software and install BitDefender.
NOTE: If you have already mapped the S: Drive to your computer, you can proceed to Step 5 below.
-
If you have antivirus software (Norton, McAfee, AVG, Avira, Sophos, etc.) already installed on your computer, remove/uninstall it and restart it.
-
Click on the Computer tab to change the option. Select Map network drive.

-
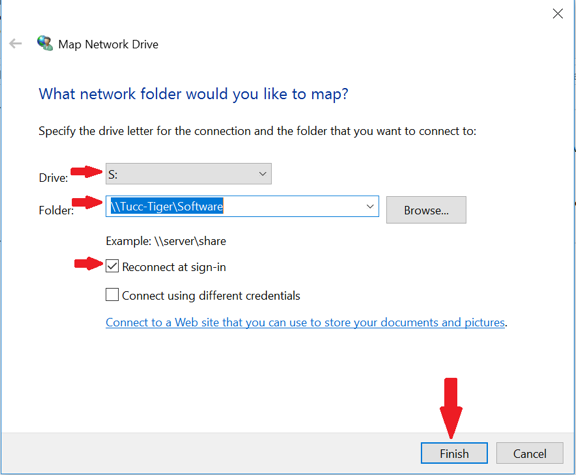
To connect to the (S: Drive) network drive, select S: from the drop-down menu and type \\Tucc-Tiger\Software into Folder. Copy the rest of the settings shown below.
-
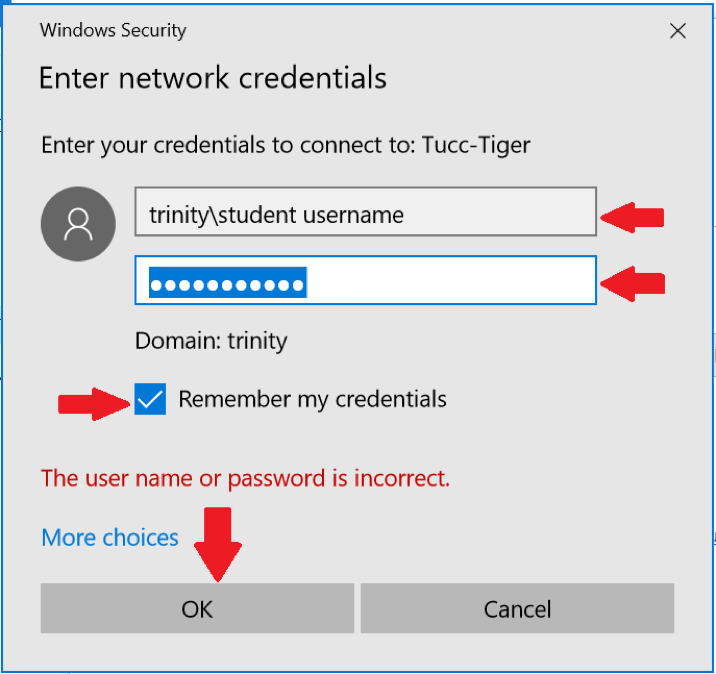
Input your usual TUNetwork credentials when prompted (start with trinity\yourUserID and check the "Remember my credentials" box).
-
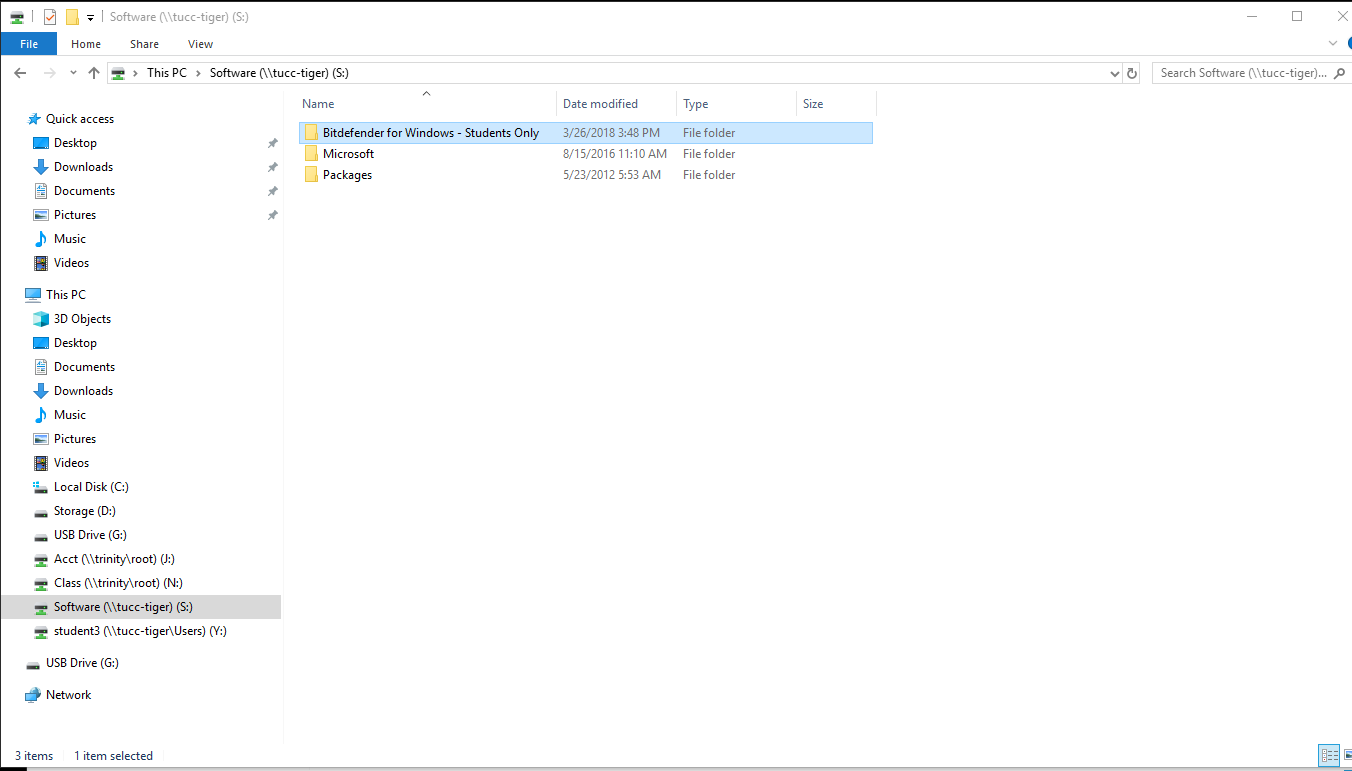
Copy the ENTIRE Bitdefender for Windows - Students Only folder from \\Tucc-Tiger\Software (S: Drive) and save it to your desktop. Copy the entire folder and contents to your desktop to install the program correctly.
-
Open the copied folder from your desktop and right-click on the epskit_x64.exe file—Select Run as administrator.
-
Follow the instructions provided by the installation wizard that will appear. Click Finis
-
Before installing Bitdefender, you must remove/uninstall any other antivirus software and enable Remote Login on your Mac to avoid potential conflicts between antivirus programs.
-
If you are a returning student, you may have installed Sophos and need to remove it by following the instructions at \\tucc-tiger\macpublic\Bitdefender or here.
-
To configure Remote Login, click on the Apple icon in the menu at the top of your desktop screen and select System Preferences... > Sharing. In the Sharing panel, ensure that "Remote Login" is checked in the list of services on the left—exit System Preferences.
-
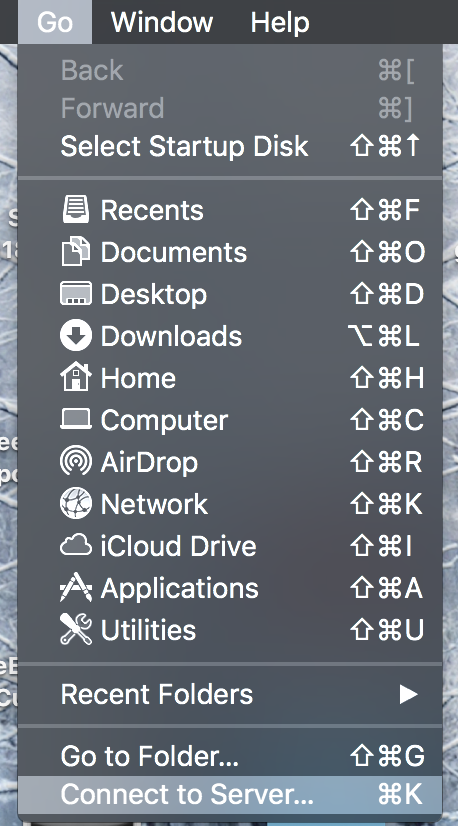
To install Bitdefender, download the .dmg file using the Finder menu at the top of the screen to select Go > Connect to Server...
-
Enter the Server Address smb://tucc-tiger/macpublic/Bitdefender and click Connect. Log in with your TU Network credentials.

-
You should now be inside the Bitdefender folder. Copy the file ending in the extension .dmg to your computer's desktop.
-
Double-click on the .dmg file to launch the installer program when the file is on the desktop. Follow the on-screen instructions to install the software.
-
Once Bitdefender is installed, click on the Bitdefender icon in the top menu bar to open the software. You can immediately download the latest security protections by clicking on Open Main Window. Clicking Open Main Window will open Bitdefender, and in the new top menu, select Actions > Update Virus Database. A computer restart may be required.
If you have questions about BitDefender, please contact the ITS Service Desk at ITSupport@trinity.edu or x7409.